How to Tape Your Feet for Blister Prevention
I’ve had some great results from pre-taping my feet prior to long hikes and can now walk around 40 miles, confident that I won’t get blisters. Even on this year’s London2Brighton challenge where the weather conditions were appalling and I ended up wearing two pairs of unfamiliar shoes, I managed 57km feeling physically broken but with my feet still intact – not a single blister.
My Blister Prevention Routine
- Keep your feet in good nick – in the run up to your long walk you should keep your feet free of callouses and moisturise to prevent cracked skin.
- Practice taping before your big event – there is a knack to applying tape so start practising early.
- I apply tape to my own feet so I can flex while I’m applying it to make sure it is not too tight.
- After taping, dust down with talcum powder to absorb any excess adhesive
- Wear Bridgedale lining socks on top of the tape.
- Put the hiking or running sock on next, being careful not to introduce creases.
- During the event, change the lining socks regularly and check the the tape is still secure.
Zinc Oxide Tape for Blister Prevention
I’ve worked my way through a number of different brands of zinc oxide tape and have now settled on Leukotape P. I’ve found this to have excellent adhesive properties and a good degree of stretch. It somehow manages to avoid leaving adhesive on the non-sticky side of the tape, which is a big bonus and a problem I’ve noted with every other roll of tape I’ve tried.
Tape Adherent
A lot of guides suggest that you purchase an additional spray adhesive to apply to the foot before adding the tape. I’ve tried this technique but I’ve stopped using it because there is a fine balance between too little and too much stickiness. If you get a decent tape you shouldn’t need extra glue and you don’t want to have any extra adhesive on the outside of the tape as it will stick to your socks, increasing the chances of fabric folds under your feet. I apply a liberal sprinkling of talcum powder before I put on my socks as well.
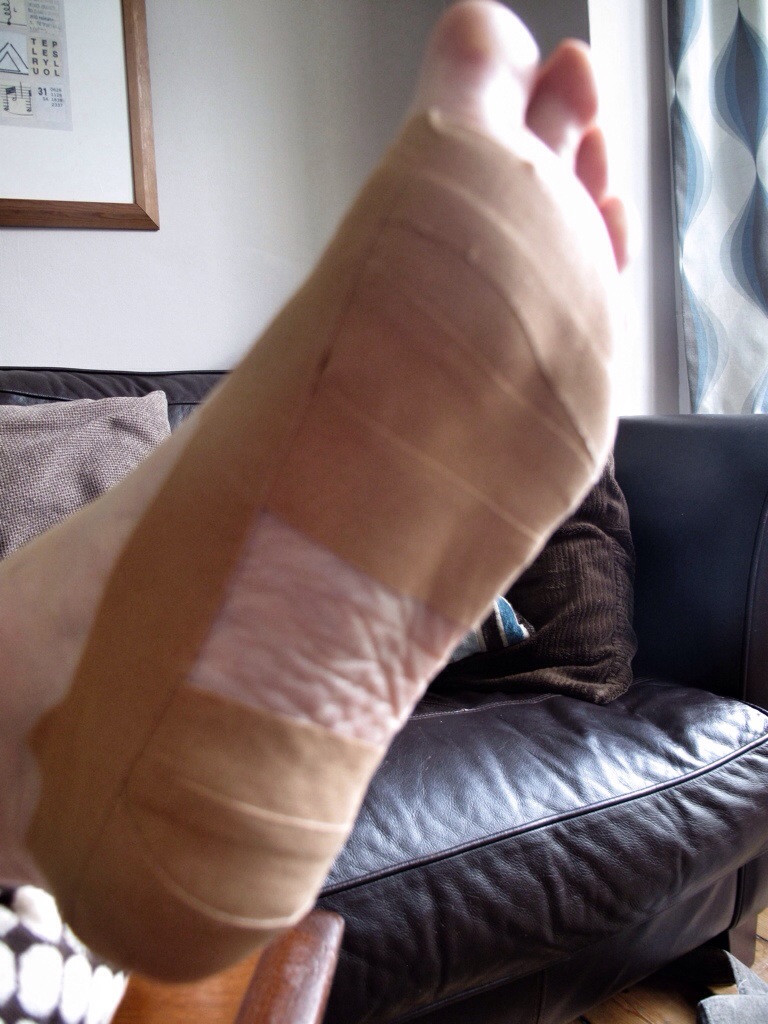
Where to Apply the Anti Blister Tape
Ideally you will have slowly built up your long walks or runs and should now have a clear idea of where you tend to develop hot spots. When I first started training for 100km walks I would get blisters forming after only 10k when wearing hiking boots, and they would always be in the same place. Mine started under the heel and across the ball of my foot and for good measure, the back of my heel would regularly rub raw.
I chose the taping technique illustrated in the video below, as it covered all my weak points. If you develop hot spots in other places you may need to extend the covered regions.
Pre-Taping for Blister Prevention
httpv://youtu.be/TLVFDPxEcG4
- Start by applying anchor strips along the inner and outer sides of your foot.
- Join the two anchor strips with a piece that goes across the heel.

- Start applying strips across the underside of your heel, with a slight overlap on each strip.
- Be careful not to introduce creases and keep your foot flexed upward (dorsi-flexed) so that you don’t apply the tape too tightly.
- Continue with more overlapped strips on the ball of your foot.
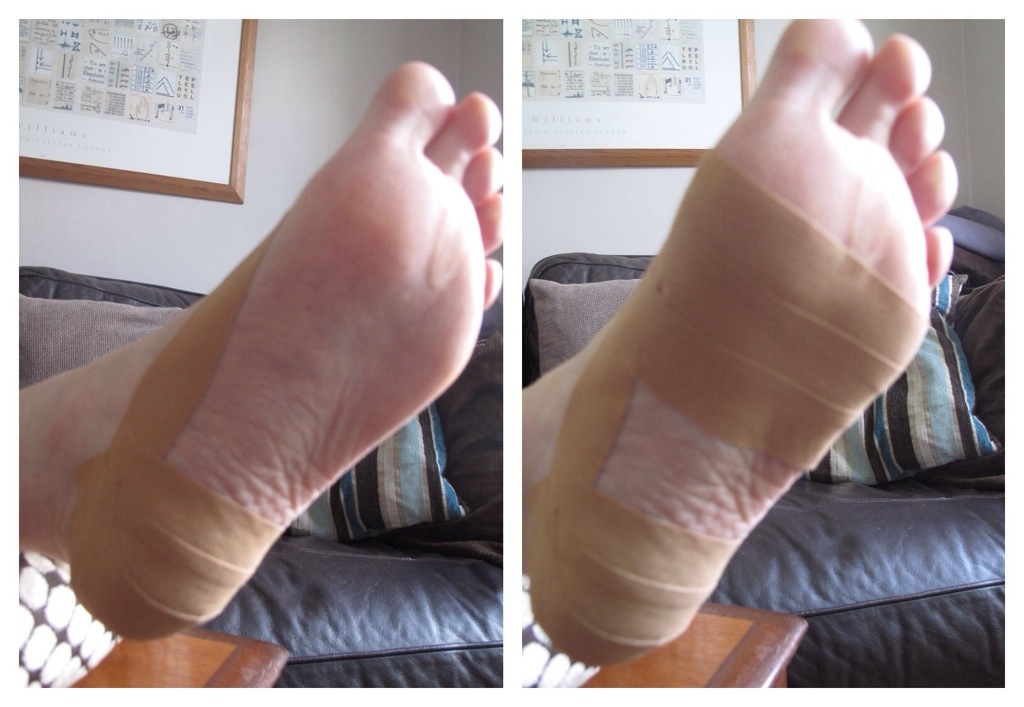
- Finish by re-applying the anchor strips on either side of the foot.
Let me know how you get on……